


Hey guys, know I'm new here and all, but I thought I'd put together a little info guide on the new DLC for those interested. Mainly I want those of you who haven't gotten it to get a sense of how the game plays, and give a few of you who have played it a few tips and random observations I've noticed throughout the day of slaughter, if you haven't already seen these for yourself.
Dreadnaught Assault and You!
Table of Contents
1.1 Introduction, What is Dreadnaught Assault?
1.2 Strategies for Capturing the Dreadnaught
1.3 Dreadnaught Inner Workings (Health Regen and Weapons)
2.1 Dreadnaught Strengths
2.2 Dreadnaught Weaknesses
2.3 Strategies for Dreadnaught Team
3.1 Defending Team Strength
3.2 Defending Team Weakness
3.3 Strategies for Killing the Dreadnaught
4.1 Known Bugs
1.1 Introduction, What is Dreadnaught Assault?
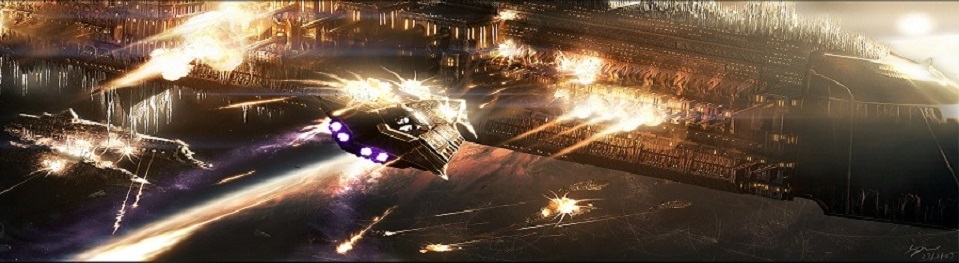
Dreadnaught Assault is the latest, and in my opinion greatest, DLC that Relic has released for our beloved Space Marine game. It focuses around the acquisition of a towering Dreadnaught war machine and the domination of randomly spawning points around the map. The match begins with both teams rushing to acquire the Dreadnaught spawning point, a control point that has a fairly quick capture speed (Akin to the points in Seize Ground). From there a player from the capturing team is chosen to become the Dreadnaught. The teams are then designated "Attacking" and "Defending" (For the purposes of this guide).
The Attacking team's goal is to move to capture points that spawn one at a time throughout the map. Each point captured earns the Attacking team 2 points (Out of 20 possible). The points take a very long time to capture with just marines, but the Dreadnaught has a 3x or 4x capture speed on the points.
The Defending Team's goal is the keep the enemy off the capture point for as long as possible (Usually up until the Dreadnaught arrives) and destroy the Dreadnaught. The Defending team earns no points until the Dreadnaught dies. Once the Dreadnaught dies, the player who scored the killing blow is awarded 1000 points and the team earns 3 points.
From there, the Dreadnaught Capture Point is once again revealed and the fight for the next Dreadnaught spawn commences. This cycle continues until either one team scores 20 points, or the times runs out.
1.2 Capturing the Dreadnaught
Since the Dreadnaught Capture Point usually has a large capture zone, you need not worry about crowding into one spot (Although on some maps this cannot be avoided, these will be mentioned further down). The general strategy I found effective for securing the point is to stagger your team. Do NOT rush in all at once for a quick cap unless the enemy team is completely destroyed. At this stage of the battle, both teams will be spawning inside their "base" behind the void shields, like in Sieze Ground, and it takes quite some time to get back to the point.
Keeping that in mind, you will want to stagger your team out in order to avoid a complete, or majority wipe. If your entire (or majority) team has to run back from the base, you'll lose the Dreadnaught. At first, send in one or two Marines, preferably Tacs to scout out just how much force the enemy is throwing into the point. Judge the best course of action from there, but in most cases you will want the rest to spread out to prevent flanks, and initiate flanks of your own. Clear the enemy off and around the point ASAP and then pile onto the point for a quick capture.
There are maps such as the new Mechanicus Facility and Manufactorum where the capture point for the Dreadnaught is in 1 or 2 locations and both locations are relatively small. In these cases I highly recommend assigning a member of your team a Plasma Cannon equipped with Ammo Stores (Optional) and Improved Plasma Charge to continually bombard the point if the enemy seems to be throwing all their Marines onto it. This can really help thin their numbers and even clear them off completely.
1.3 Dreadnaught Inner Workings
The Dreadnaught is a powerful machine, there is no doubt. Here I will take a second to go over its' armaments.
(Primary Weapon) Assault Cannon (Loyalists)/Twin-Linked Autocannon (Chaos): In battle you will notice right away that the Autocannon and Assault Cannon sound and fire nothing alike. Each one is distinct in their profile, but they are equal in their ability. Despite appearance, both hit for the same amount, and both have the same accuracy. This is the weapon you will use the most during your time as the Dreadnaught. It will easily chew through any type of Marine with 3-5 hits depending on opponent perks. It's powerful, fairly accurate at the longer ranges if fired in bursts, but it burns through it's ammunition quickly. The reload time is fairly long as well compared to most weapons, about the same as an un-perked Lascannon. However, you have unlimited ammo, so fire away as needed.
(Secondary Weapon) Underslung Multi-Melta: This gun operates exactly like a Tactical Marine's Melta gun. It'll one-shot just about anything within four feet in front of the gun. While this is up for debate, and I need to test this with my Chapter Brothers if time permits, it seems to me that the Dreadnaught's Multi-Melta has a farther effective range than a Tactical Melta. It's kill zone is the same, but the damaging cone shoots out farther. Like the Primary Weapon this weapon has unlimited ammo, and recharges with each shot at the same speed as an unperked Tactical Melta.
(Melee Weapon) Dreadnaught Power Fist (Loyalists)/Lightning Claws (Chaos): Think of this as a Thunder Hammer with Killing Blow, because that is essentially what this weapon is. It's a slow swing, has a huge arc, and will one shot anything it directly hits. It goes without saying that if you have the opportunity to use this, it's not only effective but very satisfying to hear the meaty thunk and watching as your enemy's broken body sails through the air. When your Multi-Melta is recharging and you need to deal with a pesky Tactical Melta or Assault Marine/Raptor, your fist is your friend.
Sprint and Charge: Like with the Marines, the Dreadnaught can sprint. However the sheer size and momentum prevent a Dreadnaught from turning easily while sprinting, and the sprint is like in a Call of Duty game. You get several seconds of the sprint, then you have to let the Dreadnaught "Rest". Imagine a small refilling stamina bar. If you sprint before it's full you only get that much before you slow. The Dreadnaught also takes a good while to recover after sprinting, around a 1 second vulnerability. The Dreadnaught can do a "shoulder ram" while charging, in which he takes three gigantic steps with his head down and barrels through anyone in his path before ending with a hard back hand swing of his Power Fist/Lightning Claws. Any Marine in the path of the charge will be stunned and suffer a large armor/health loss. Any Marines caught in the swing at the end will die.
Stated by CruciasNZ that it is quicker to gun down an ASM with your Primary while backing off than switching to Melta. Best to use melta in an ambush (I.E. You see him coming down and have time to switch, or you know enemies are coming around that next corner). Pivoting is also faster with the Autocannon, so make sure you're facing the right way when firing the Melta.
Side Note: It is worth noting that the Dreadnaught's over-the-shoulder camera can be a bit strange. The camera alternates between each shoulder depending on the weapon you're using. The Primary Weapon is in the right arm, so while that is equipped you will be looking over the Dreadnaught's right shoulder. The Secondary and Melee weapons will switch the camera to your left shoulder. This will be a bit disorienting at first, but you can grow used to the switch rather easily.
Dreadnaught Health and Invulnerability: Dreadnaught has an enormous amount of health and a natural armor. His health can be compared with the amount of firepower it would take to down one and a half of the Chaos Champions from Exterminatus. He also regenerates health, but this is done in a limited way to help balance his already considerable toughness.
Think of the Dreadnaught's health pool in 3 Tiers. The Tiers are as follows:
1st Tier (No Visible Signs): 67% Health - 100% Health
2nd Tier (Emitting some smoke): 34% - 66%
3rd Tier (Flaming and constantly smoking): 1% - 33%
As long as the Dreadnaught's health remains in one of those Tier ranges, he will regenerate up to the maximum of that specific Tier. He also regenerates health fairly quickly outside of combat.
The Dreadnaught also comes with 1 "Combat Stim" equipment. This equipment is irreplaceable from dropped equipment and grants you 10 seconds of invulnerability when used. Needless to say, a powerful tool. While it's up to you to decide how to use it, I preferred to save it for particularly bad fights that looked like they'd drop me down to the next Tier of health. Do not be afraid to use it, but use it wisely.
The Dreadnaught also comes with a built in Teleport Beacon. USE THIS TO YOUR ADVANTAGE!
Thanks to Domine Nox for this.
Thunder Hammer/Daemon Maul takes 10 hits to kill Dreadnaught. With Killing Blow it takes 6 hits. With Killing Blow and Combat Stims it takes 5 hits. Melta-gun takes around 16 shots. Plasma takes 7 fully charged shots. Lascannon takes around 30 shots, needs assistance though as the reload time provides enough of a lapse for the Dreadnaught to regain health. Heavy Bolter takes around 315 rounds of constant fire. Most other weapons are incredibly ineffective. (eg. Vengeance Launcher a full 18 shots takes off maybe 1/3 of its health)
2.0 The Attacking Team
2.1 Dreadnaught Strengths
As you might expect from its' tabletop counterpart, this thing is a walking engine of death. With an automatic weapon, powerful melee weapon, and under slung melta gun, the player who gets the Dreadnaught will inevitably earn many many kills if they play smart. As the Dreadnaught, you can take an immense amount of punishment and deal it out in kind, so you are naturally going to be the one in the lead of the score. Your job is to move to the capture points and assist your team as a mobile weapons platform and "Tank". Everyone will be gunning for you, so don't be too reckless.
2.2 Dreadnaught Weaknesses
The Dreadnaught has a few weaknesses that can spell doom for it if you're not careful. The most obvious weakness is it's size. The thing is nigh impossible to miss. You can hear it easily, see it easily, and more importantly shoot it easily. The Dreadnaught will soak up most of the fire and it's health will wear down if you're not careful about taking cover behind large walls. It's size also prevents you from making use of some corridors and vantage points.
Another weakness, and perhaps the most important one, is that as formidable as the Dreadnaught is you will inevitably fall if left alone for a short while. Concentrated fire from the enemy team will take that huge health pool of yours down faster than you can say "The Emperor Protects". You NEED your teammates with you to draw off that enemy fire you can't take care of yourself.
2.3 Strategies for the Dreadnaught Team
Now the Attacking Team tends to be the easy role here thanks to your Ace, the Dreadnaught. Some general strategies to use are to keep your team spread out around the Dreadnaught. Intercept any melta gunners and keep watch for attacking Hammer marines. Move from point to point and last as long as you can, but in most cases you will lose the Dreadnaught, from there you quickly jump back on the Dreadnaught Capture Point and continue like you were before. You are the steamrolling team, and your goal is to keep that momentum rolling.
Tac Marines make for the best class (in my opinion) to cover a Dreadnaught with, as they can move with him easily, have a wide variety of weapons to keep the enemy away, and also have Rapid Deployment. However Devestators can also be a good class, particularly the heavy bolter. Cover the Dreadnaught's back with it and you'll find yourself with plenty of kills yourself, you'd be surprised how many think that rear approach is open. Assault Marines can hang around the vantage points near the Dreadnaught and easily intercept enemy Assaults that try to make easy prey of the escorts or even the Dreadnaught itself.
On a particular note, it needs to be said that the Attacking team will always respawn at the Base. This can put you far away from the action and struggling to regroup with your team and your Dreadnaught. To counter this, the Dreadnaught, as stated in the Weapons section, comes with a built in Teleport Homer you can spawn off of. Use this to keep close to your team. This is also another reason I say Tac Marines are a good choice of Escort, as they have access to the Rapid Deploy Perk and can make ample use of that to quickly reinforce a Dreadnaught should they die along the way.
3.0 The Defending Team
3.1 Defending Team Strengths
This is it. The enemy has a Dreadnaught, but all hope is not yet lost, for our Brothers still have some tricks up their sleeves. As the Defenders you must be ready for the inevitable slaughter that will follow, as well as the points you will lose. Once that Dreadnaught reaches a point, it will be taken unless you kill the Dreadnaught first. Do not be afraid to die. You can either be killed fighting or killed trying to hide from the Dreadnaught's unstoppable weaponry. As the Defenders you have several perks that can be used to stop the enemy from advancing. The first and foremost are the points themselves. These are bottlenecks. The Dreadnaught and more often the Attacking team themselves will be clustered on these points. These make for great kill zones, though be prepared to fight hard because that Dreadnaught will chew your team apart as you spring the trap.
Despite your horrific losses as the Defenders, your spawns work to your advantage. Where as the Attacking Team must either wait the 15 seconds to spawn back on the Dreadnaught, or take the Base spawn and run back, the Defenders will spawn around the map in a CTF style spawn system. Over the past few matches I noticed that it tends to spawn your team AROUND the enemy, giving you an automatic perimeter in which to encircle the Dreadnaught and the Attackers.
3.2 Defending Team Weaknesses
It goes without saying your biggest weakness is not having the Dreadnaught itself. It will inevitably chew through you and you must be prepared for losses. Do not get discouraged, just look for new avenues to exploit. The spawn system also tends to leave you isolated, making Defense more of a Guerrilla style fight rather than the cluster and escort style gameplay favored by the Attackers. Sometimes, you even spawn right in the path of the Dreadnaught, but such is luck sometimes.
3.3 Strategies for Killing the Dreadnaught
The biggest objectives for the defenders is not to minimize casualties but to bring that behemoth down before the Attackers score too many points for you to catch up. This can be accomplished in many ways. The best strategy I've noticed is to attack at range. While there are a few people who go lone wolf and hunt, the majority of the enemy team will cluster around the Dreadnaught for defense and point captures. This opens them up to a Plasma Cannon, and the Dreadnaught to a Lascannon. Assuming we play by Ladder Rules, you will want the max of one Lascannon and one Plasma Cannon deployed as Defenders. In PuG games, bring out as many of those guns as you possibly can and let rip...
Focus your fire. Lascannons especially are devastating if you have 2-3 players concentrating fire on the Dreadnaught at the same time. Distractions are also recommended. While I normally do not recommend these, Blind Grenades are very effective against the Dreadnaught, and can open the way for the Thunder Hammer/Daemon Maul. The Hammer/Maul is by far the most damaging weapon against the Dreadnaught. If you have Killing Blow equipped, each direct hit will take off 1/5 of the Dreadnaught's health. The trick though, is getting past that first hit, because more often than not you will die by the Escorts, or the Dreadnaught will melta you, or worse, smack you upside the head with his melee weapon. One hit from the Hammer/Maul isn't enough to knock the Dreadnaught down a health tier, he will just regenerate it.
Try attacking with Tac Marines and Devestators to draw the Escorts away and the Dreadnaught's attention, then have 1-3 Assault Marines/Raptors armed with the Hammer/Mauls fly in and attack from behind. This is by far the FASTEST way of killing a Dreadnaught.
Be aware as an Assault/Raptor however. The Dreadnaught has a melee stun attack that, when he slams the ground, is akin to a Sure Strike/Killing Blow equipped hammer. It will hurt, or flat out kill you. It will definitely stun you. It is, however, slow and very obvious.
The game is patience and coordination.
4.1 Known Bugs
While they are few, thankfully, I have noticed people saying they cannot access the content, saying they need to download the maps/mode.
In most cases, I've found these people to be selecting the "Dreadnaught Assault" map playlist in the Dreadnaught Assault versus mode. This is bugged. That playlist does not exist. Since you need to have the content already downloaded in order to even ACCESS the Dreadnaught Assault Mode, the maps are already integrated into the "Classic" Map Rotation. If you select "Classic" you will inevitably play on the new maps in Dreadnaught Assault. The other playlists should work fine when selecting the new Map Playlist.
A new system is in place for the host selection, and while not really a "bug" it is worth noting there is an increase in "Migrating to New Host" pauses in games now, though these only last 3-5 seconds in most cases and will stop altogether after a few tries.
Hope you enjoyed this, and if you have any additions to the guide or comments please leave a comment below.
-NightWolf

Dreadnaught DLC Guide
Started by
NightWolf889
, Jan 25 2012 07:24 AM
-
 This topic is locked
7 replies to this topic
#1

NightWolf889
-
- Members
-

- 298 posts
Crimson Fist Initiate
Posted 25 January 2012 - 07:24 AM
“Victory does not always rest with the big guns:
but, if we rest in front of them we shall be lost.”
-Commander Argentius, Silver Skulls
but, if we rest in front of them we shall be lost.”
-Commander Argentius, Silver Skulls
#2
CruciasNZ
-

- Administrators
- Others: GWRS 2.0 Supporter, GWRS Governing Council
-

- 12,171 posts
Squeak Squeak Mother F***ers
- Origin:Minaithnir2005
- Xbox Live:CruciasNZ
- PSN:CruciasNZ
- Steam:lienhart2005
- NDS Friend Code:1650-2364-6257
- Social Groups:Dark Messiah Complex, The Inquisition
Posted 25 January 2012 - 07:31 AM
Very well written
It's quicker to fire the Autocannon at ASM while backing off than to swap to Melta. Also you pivot faster firing the cannon than wielding melta
It's quicker to fire the Autocannon at ASM while backing off than to swap to Melta. Also you pivot faster firing the cannon than wielding melta
Do Not XBL-Message or PM Me Website or Community Issues/Requests.
Use The Support Centre Instead!
#3
NightWolf889
-
- Members
-
- 298 posts
Crimson Fist Initiate
Posted 25 January 2012 - 07:38 AM
Very well written
It's quicker to fire the Autocannon at ASM while backing off than to swap to Melta. Also you pivot faster firing the cannon than wielding melta
Noted and adding in now.
“Victory does not always rest with the big guns:
but, if we rest in front of them we shall be lost.”
-Commander Argentius, Silver Skulls
but, if we rest in front of them we shall be lost.”
-Commander Argentius, Silver Skulls
#4
Domine Nox
-
- Members
-
- 1,950 posts
Regent of Ultramar
Posted 25 January 2012 - 03:13 PM
I disagree on the Tac Marines being the most effective Dreadnaught defender. While I can see the validity of your point (the versatile weapons at your disposal), I feel that Assault is actually the more effective class for defense as Assault Marines can quickly get to a point before the Dreadnaught and clear out potential ambushes, they are very capable at close range for anyone that gets up on the Dreadnaught itself, and the speed and capabilities of an Assault make them ideal for leaping out and taking down Devastators that are trying to pick off the Dreadnaught from a distance, especially as they are focused away from themselves trying to bring the big guy down.
Also a tested note Thunder Hammer/Daemon Maul takes 10 hits to kill Dreadnaught. With Killing Blow it takes 6 hits. With Killing Blow and Combat Stims it takes 5 hits. Melta-gun takes around 16 shots. Plasma takes 7 fully charged shots. Lascannon takes around 30 shots, needs assistance though as the reload time provides enough of a lapse for the Dreadnaught to regain health. Heavy Bolter takes around 315 rounds of constant fire. Most other weapons are incredibly ineffective. (eg. Vengeance Launcher a full 18 shots takes off maybe 1/3 of its health)
Also a tested note Thunder Hammer/Daemon Maul takes 10 hits to kill Dreadnaught. With Killing Blow it takes 6 hits. With Killing Blow and Combat Stims it takes 5 hits. Melta-gun takes around 16 shots. Plasma takes 7 fully charged shots. Lascannon takes around 30 shots, needs assistance though as the reload time provides enough of a lapse for the Dreadnaught to regain health. Heavy Bolter takes around 315 rounds of constant fire. Most other weapons are incredibly ineffective. (eg. Vengeance Launcher a full 18 shots takes off maybe 1/3 of its health)
Nolo mihi libet sis multo felis.
#5
Armoured Priest
-
- Administrators
- Others: GWRS Governing Council
-
- 10,192 posts
Man in the long black coat
- Steam:(bringit) DrachenBlut
- Social Groups:Dark Messiah Complex
Posted 25 January 2012 - 09:14 PM
Thank all for the information. This shall be useful for my first game of dreadnought assault.
Burning, Stabbing, Devouring, Changing, Resurrecting and creating in Sanctuary
We have such sights to show you...

#6
Good Monsin
-

- Members
- 20 posts
Meatshield
Posted 25 January 2012 - 09:55 PM
Tacs have been my best friends walking around with the melta guns burning down raptors for me.
Good Monsin, Glorified Meatshield In The Gothic Wars Since Jan 2012.
#7
NightWolf889
-
- Members
-
- 298 posts
Crimson Fist Initiate
Posted 25 January 2012 - 11:59 PM
I disagree on the Tac Marines being the most effective Dreadnaught defender. While I can see the validity of your point (the versatile weapons at your disposal), I feel that Assault is actually the more effective class for defense as Assault Marines can quickly get to a point before the Dreadnaught and clear out potential ambushes, they are very capable at close range for anyone that gets up on the Dreadnaught itself, and the speed and capabilities of an Assault make them ideal for leaping out and taking down Devastators that are trying to pick off the Dreadnaught from a distance, especially as they are focused away from themselves trying to bring the big guy down.
The main reason I say Tacs make for the better escort, and I'll go back and a make sure this is clearly stated in a moment, is because of that Teleport Homer on the Dreadnaught and Rapid Deployment. Personally I think the best Attacking team make-up would be 3 Tacs (Personal choice on weapons) with Rapid Deploy, 3 ASMs, and 1 HB or PC Dev. But, comes down to what your Brothers want to fight with and I'm not going to tell anyone what they can/cannot use.
Also a tested note Thunder Hammer/Daemon Maul takes 10 hits to kill Dreadnaught. With Killing Blow it takes 6 hits. With Killing Blow and Combat Stims it takes 5 hits. Melta-gun takes around 16 shots. Plasma takes 7 fully charged shots. Lascannon takes around 30 shots, needs assistance though as the reload time provides enough of a lapse for the Dreadnaught to regain health. Heavy Bolter takes around 315 rounds of constant fire. Most other weapons are incredibly ineffective. (eg. Vengeance Launcher a full 18 shots takes off maybe 1/3 of its health)
I'll post this under the Dreadnought health section. Thank you.
“Victory does not always rest with the big guns:
but, if we rest in front of them we shall be lost.”
-Commander Argentius, Silver Skulls
but, if we rest in front of them we shall be lost.”
-Commander Argentius, Silver Skulls
#8
telboy007
-

- Members
- 7 posts
Meatshield
Posted 27 January 2012 - 05:36 PM
I like this mode a lot, it is also in my opinion the most frustrating mode!  Especially on pub teams that don't bother trying to secure the dreadnought, I'll have to join in with you guys before I start crying.
Although as a kick ass armour (sorry UK spelling) clad holy warrior from the future, I obviously don't cry.
Especially on pub teams that don't bother trying to secure the dreadnought, I'll have to join in with you guys before I start crying.Although as a kick ass armour (sorry UK spelling) clad holy warrior from the future, I obviously don't cry.
telboy007, Glorified Meatshield In The Gothic Wars Since Jan 2012.


